SFTP (and Thttpd)
SFTP (SSH File Transfer Protocol) is a standard and secure method of transferring files. There are clients available for all platforms. You can configure an SFTP server to send and receive files directly with your Docker volumes.
Install a demo web server (thttpd)
Thttpd is a tiny static HTTP server for hosting websites. It will be used for demonstration purposes in showing the effect of transferring files directly into its volume, via SFTP. You can substitute this with Nginx if you prefer. This same approach will work with any Docker volume.
---
title: SFTP and Thttpd share the same volume
---
graph TD;
B[Web browser] --|internet|--> C
D[SFTP client] --|internet|--> A
subgraph Docker network
    C[Thttpd container] --|volume link|--> V((volume: thttpd_files))
    A[SFTP container] --|volume link|--> V((volume: thttpd_files))
end
Configure thttpd
pi make thttpd config
Thttpd will serve a website at a URL of your choosing:
THTTPD_TRAEFIK_HOST: Enter the website domain name (eg. thttpd.example.com)

: www.pi.example.com

? Do you want to enable sentry authorization in front of this app (effectively making the entire site private)?
> No
  Yes, with HTTP Basic Authentication
  Yes, with Oauth2
  Yes, with Mutual TLS (mTLS)
Install thttpd:
pi make thttpd install
Add a new route on the sentry
sentry route set --layer7 www.pi.example.com 10.13.16.2 443 --proxy-protocol true
You may also create the route interactively through the Traefik config menu.
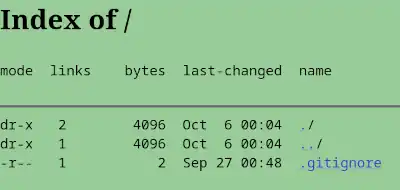
Open the website in your browser
- Open
https://www.pi.example.comin your web browser. - Because there are no files uploaded yet, the page will show only an index:
Configure SFTP
pi make sftp config
SFTP_PORT: Enter the public SSH port (eg. 2223)

: 2223

SFTP_USERS: Enter the user:uid list (eg. ryan:1000,gary:1001)

: www:54321
The thttpd container has a user with UID 54321, so the SFTP user
(www) has to have the same UID 54321.
SFTP_VOLUMES: Enter the volume:user:mount list (can be blank)

: thttpd_files:www:public_html
The SFTP_VOLUMES setting is a list of 3-tuple separated by the
character :
- The Docker volume to mount (e.g.,
thttpd_files) - The SFTP user that should own the mountpoint (e.g.,
www.) - An arbitrary mount point sub-directory, only visible to the SFTP user
In the example above, the Docker volume named thttpd_files is
mounted inside the www user’s SFTP home directory, in a
sub-directory named public_html.
The user may have access to multiple volumes, each with a different mount point. Additional volumes may be mounted as a comma separated list of 3-tuples:
thttpd_files:www:public_html,other_volume:www:other_filesIf mounting multiple volumes under one SFTP user, all volume files must share the same owner. If the files require different ownership, you must use different SFTP users.
Install sftp:
pi make sftp install
Enable SFTP traffic
Enable the SFTP entrypoint on the sentry
sentry make traefik config
? Traefik:
> Config
  Install (make install)
  Admin
  Exit (ESC)

? Traefik Configuration:
  Traefik user
> Entrypoints (including dashboard)
  TLS certificates and authorities
  Middleware (including sentry auth)
  Advanced Routing (Layer 7 / Layer 4 / Wireguard)
  Error page template
v Logging level

? Traefik entrypoint config
  Show enabled entrypoints
  Configure stock entrypoints
> Configure custom entrypoints

? Custom Entrypoints:
  List custom entrypoints
> Add new custom entrypoint
  Remove custom entrypoints

Enter the new entrypoint name:

: sftp

Enter the entrypoint listen address:

: 0.0.0.0

Enter the entrypoint port:

: 2223

Enter the protocol (tcp or udp):

: tcp

? Is this entrypoint downstream from another trusted proxy?
> No, clients dial directly to this server. (Turn off Proxy Protocol)
  Yes, clients are proxied through another trusted proxy. (Turn on Proxoy Protocol)
SSH does not support Proxy Protocol, so be sure to disable it.
Press ESC three times to go back to the main menu.
Create the SFTP route on the sentry
sentry route set sftp --layer4 10.13.16.2 2223 --proxy-protocol false
You may also create the route interactively through the Traefik config menu.
Authorize your client’s SSH public key
Copy the contents of your SSH pubkey from your personal workstation to your clipboard:
## Your key may be in a different location
cat ~/.ssh/id_ed25519.pub
Authorize the key to access the server:
pi make sftp ssh-authorize-key
Enter the information at the prompt:
Which SSH username do you want to add a key for? : www
Enter the SSH public key : xxxxxxxxxxxxxxxxxxxxxxxxxxxx
- Enter the SSH username (e.g.,
www.) - Paste the SSH key from your clipboard, then press
Enter.
If you want to authorize multiple keys, repeat the last step. (If you
want to remove all the authorized keys for a user, run pi make sftp ssh-clear-id and it will prompt for you to enter the username.)
Configure your personal workstation as a client
cat <<EOF >> ~/.ssh/config
Host sftp.pi.example.com
    User www
    Port 2223
    ControlMaster auto
    ControlPersist yes
    ControlPath /tmp/ssh-%u-%r@%h:%p
EOF
Test connecting:
sftp sftp.pi.example.com
The authenticity of host '[sftp.pi.example.com]:2223 ([X.X.X.X]:2223)' can't be established.
ED25519 key fingerprint is SHA256:xxxxxxxxxxxxxxxxxxxxxxxxxxxxxxxxxx.
This key is not known by any other names.

Are you sure you want to continue connecting (yes/no/[fingerprint])? yes
If connected successfully, you should see the sftp> prompt. Type
ls and you should see the public_html sub-directory listed:
sftp> ls
public_html
Press Ctrl-D to quit.
Test uploading a new index.html to thttpd volume
Create a temporary test folder on your personal workstation and create an index.html file:
cd $(mktemp -d)
echo '<h1>Hello, World!</h1>' > index.html
Copy the files to the server into the public_html folder:
scp index.html sftp.pi.example.com:public_html/
Refresh the website in your browser
The new page should now be public (e.g., https://www.pi.example.com):

Use Rclone to synchronize whole directories to SFTP
Unfortunately, the traditional tool rsync only works with SSH, not SFTP. An alternative tool named Rclone can be used in place of it.
- On your personal workstation, install
rclonevia your package manager (preferred) or from the official site.
Create rclone config file
mkdir -p ~/.config/rclone

cat <<EOF >> ~/.config/rclone/rclone.conf
[pi]
type = sftp
host = pi.example.com
user = www
port = 2223
EOF
How to use rclone
Read the rclone docs for comprehensive usage information.
List all the remote files
rclone ls pi:
2 public_html/.gitignore
23 public_html/index.html
Syncronize a local directory to the remote public_html folder
Sync the current directory ( . ):
## dangerous:
rclone -v sync . pi:public_html/
This is a potentially destructive command: it makes the remote directory exactly like your local directory. All existing files in the remote destination directory are deleted if they do not exist locally.
It is recommended to create an alias so that you don’t fat-finger the
sync command. For example, setup your local web root in your home
directory ~/public_html:
mkdir -p ~/public_html
Next create this alias in your ~/.bashrc file:
alias sync-web="rclone -v sync ~/public_html pi:public_html/"Then run the alias whenever you want to sync your local website to the remote public site:
sync-web